Datalake AutoML
To access, just follow the pathX Platform > Technology > Customization > Datalake AutoML.
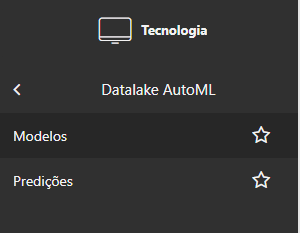
2 tabs available: Models and Predictions.
The tool encourages the use of Machine learning in processes with the intention of automating steps.
The use of the tool is simplified, meaning that the user does not need to have full knowledge of Machine learning, artificial intelligence or programming, to create process automation models.
Models
Using the tool
To train the AI, make a CSV of data available within the tool.
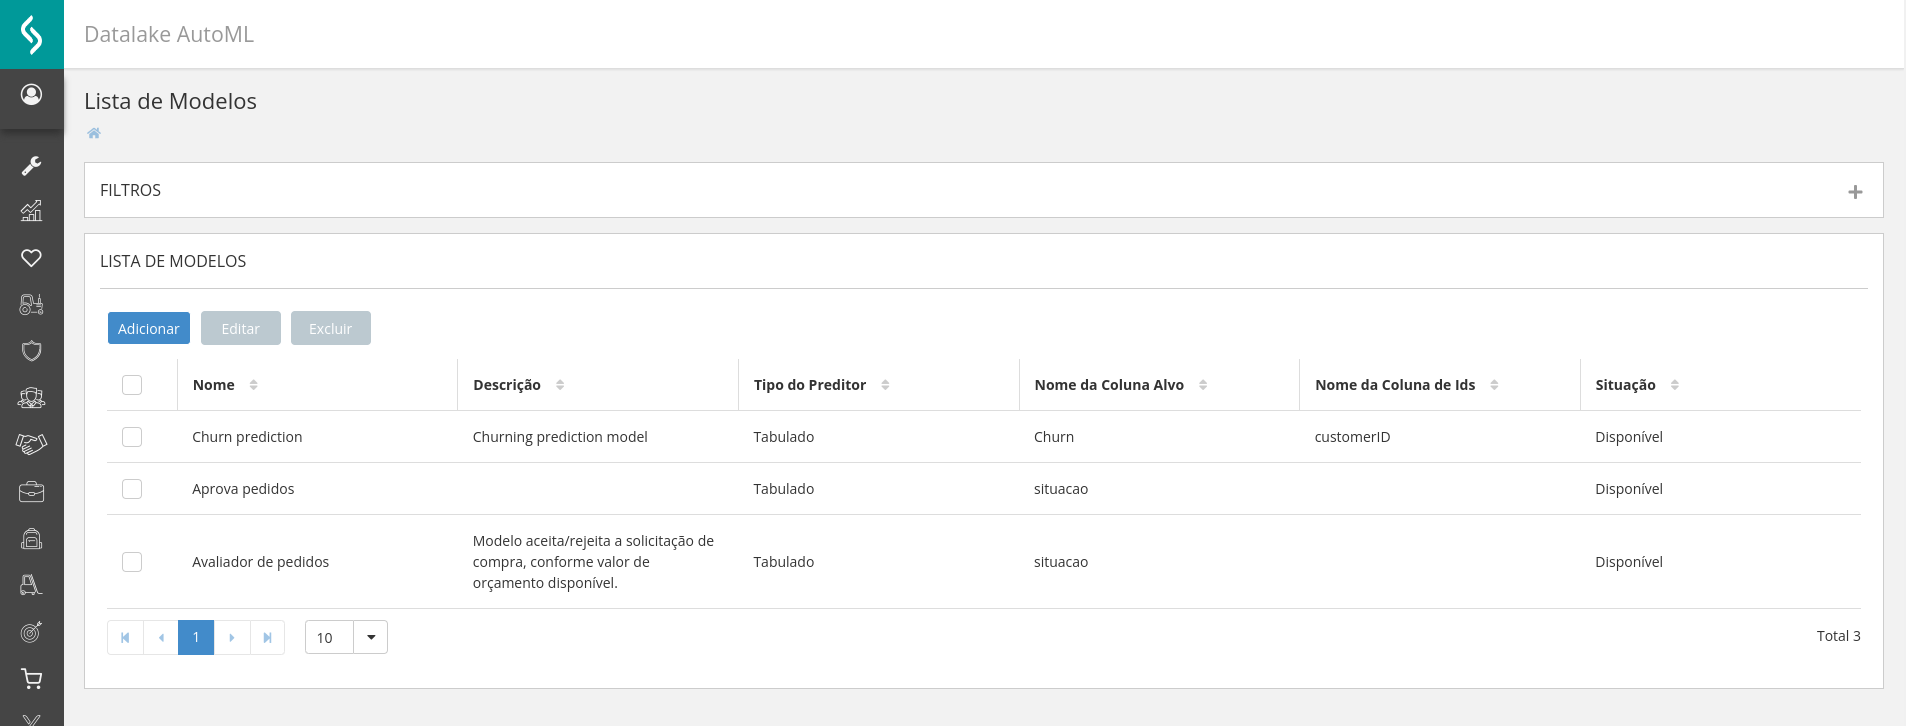
Model list
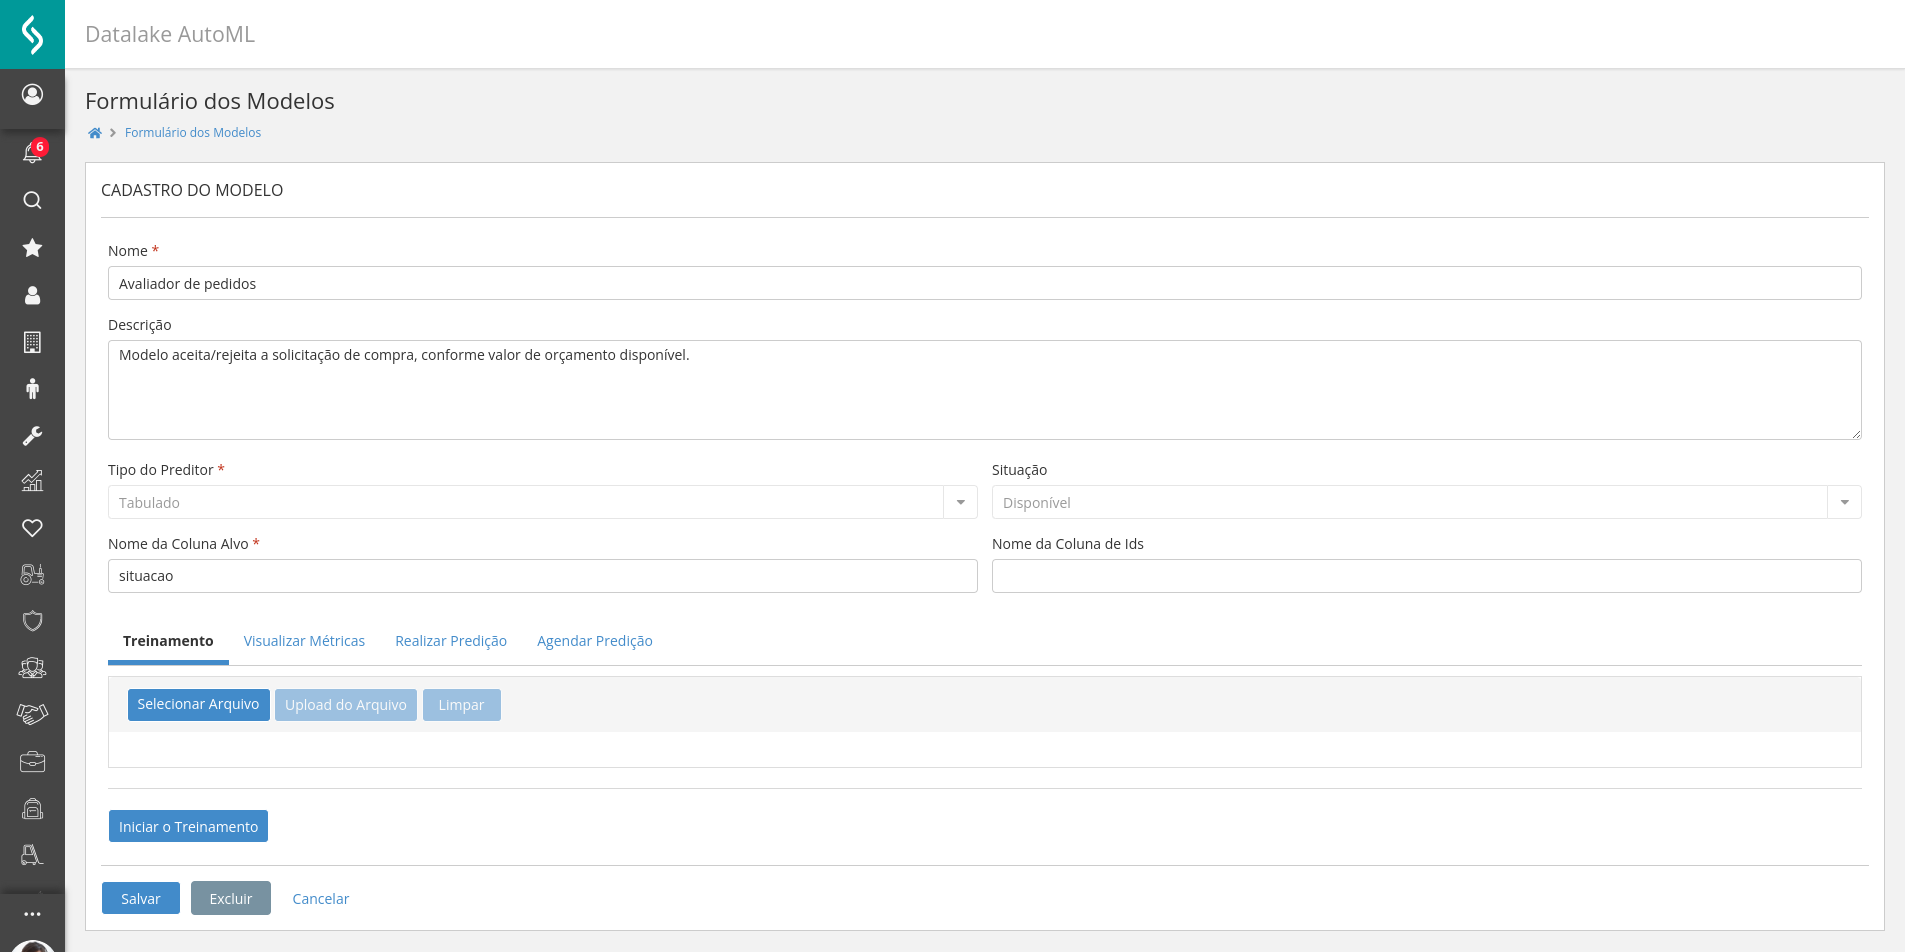
When clicking Add, fields to be filled in are displayed, they are:
- Name*: Name that will be displayed in the model registration tab;
- Description: Model description;
- Predictor type*: Data type for creating the model (Tabulated, Text, Image, Time series). Currently, only the “Tabulated” data type is supported;
- Situation: It will be automatically populated by the tool according to the model's status, whether Completed, Training or Failed;
- Target Column Name*: Name of the target column for prediction. Based on the CSV data that the tool will be made available;
- ID Column Name: Name of the index column, if it exists.
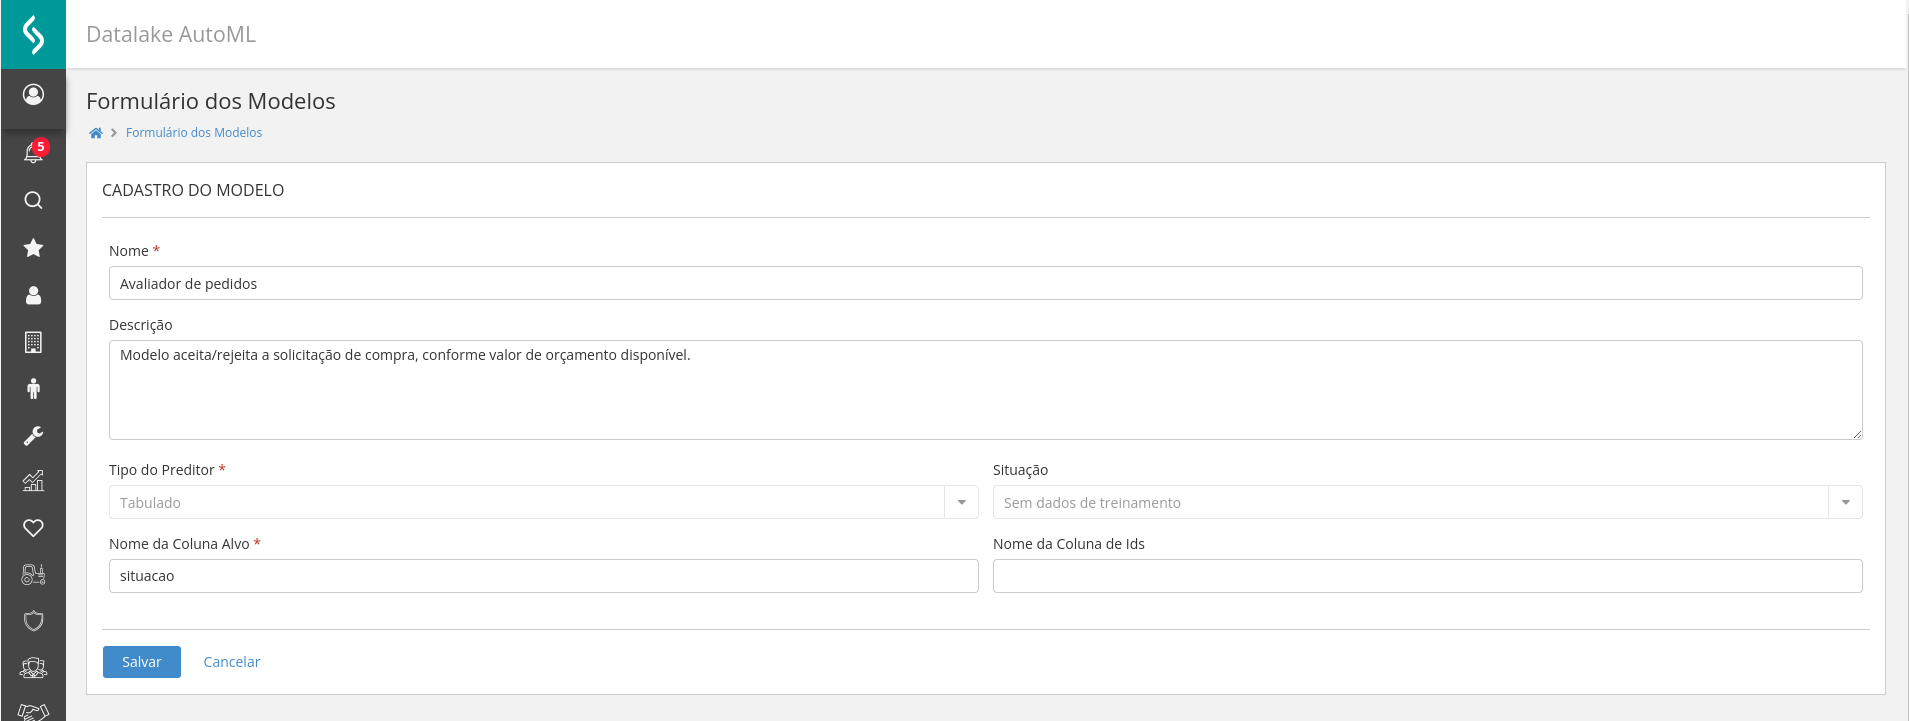
Important
Fields with "*" are mandatory.
When you click on save, the Training tab will open where you can insert an SSV data file. After inserting the file, click on Upload File.
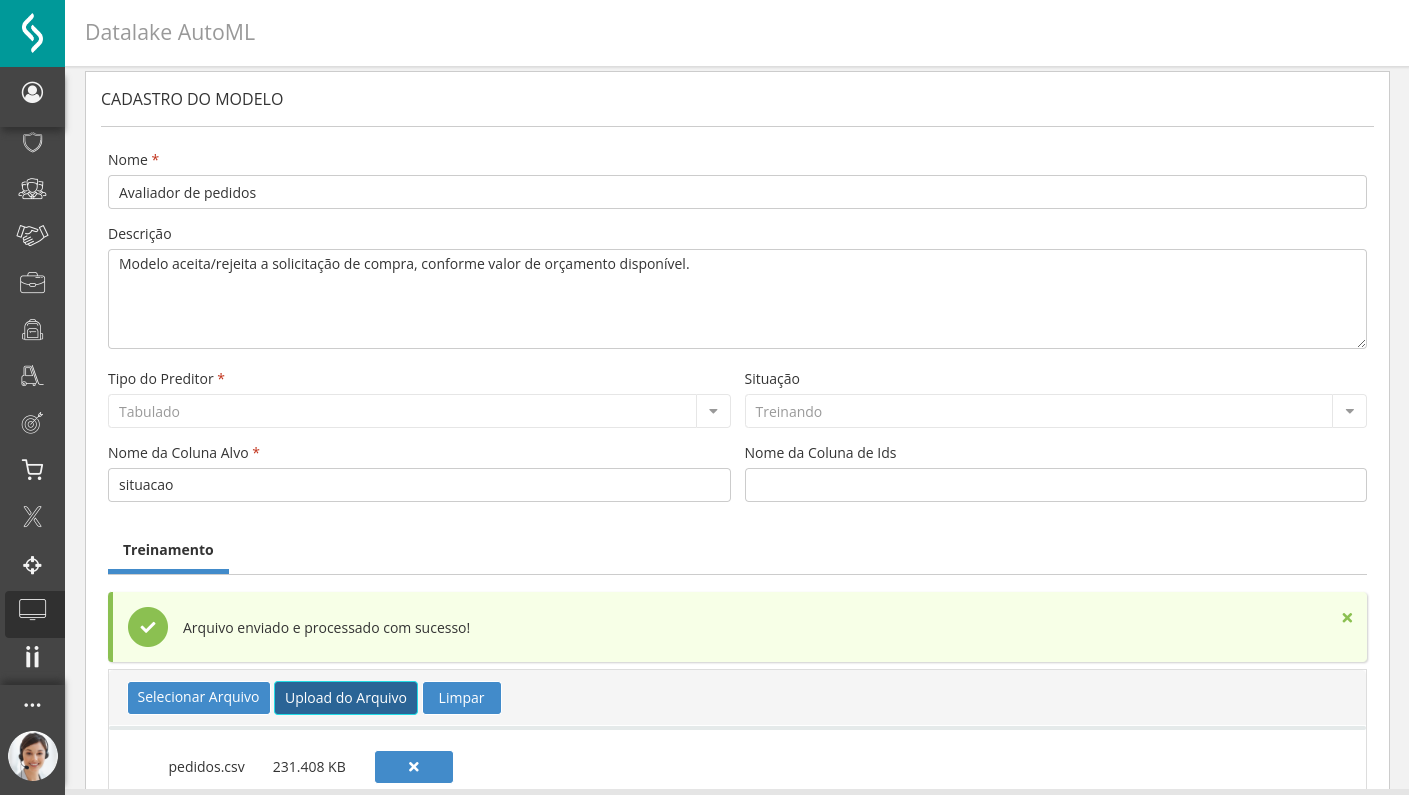
The tab will be updated automatically, so you can clickStart Training.
When the model training process is processed, the user receives a notification within the platform informing the status of the model.
If the process is completed successfully, you will be able to access the next step.
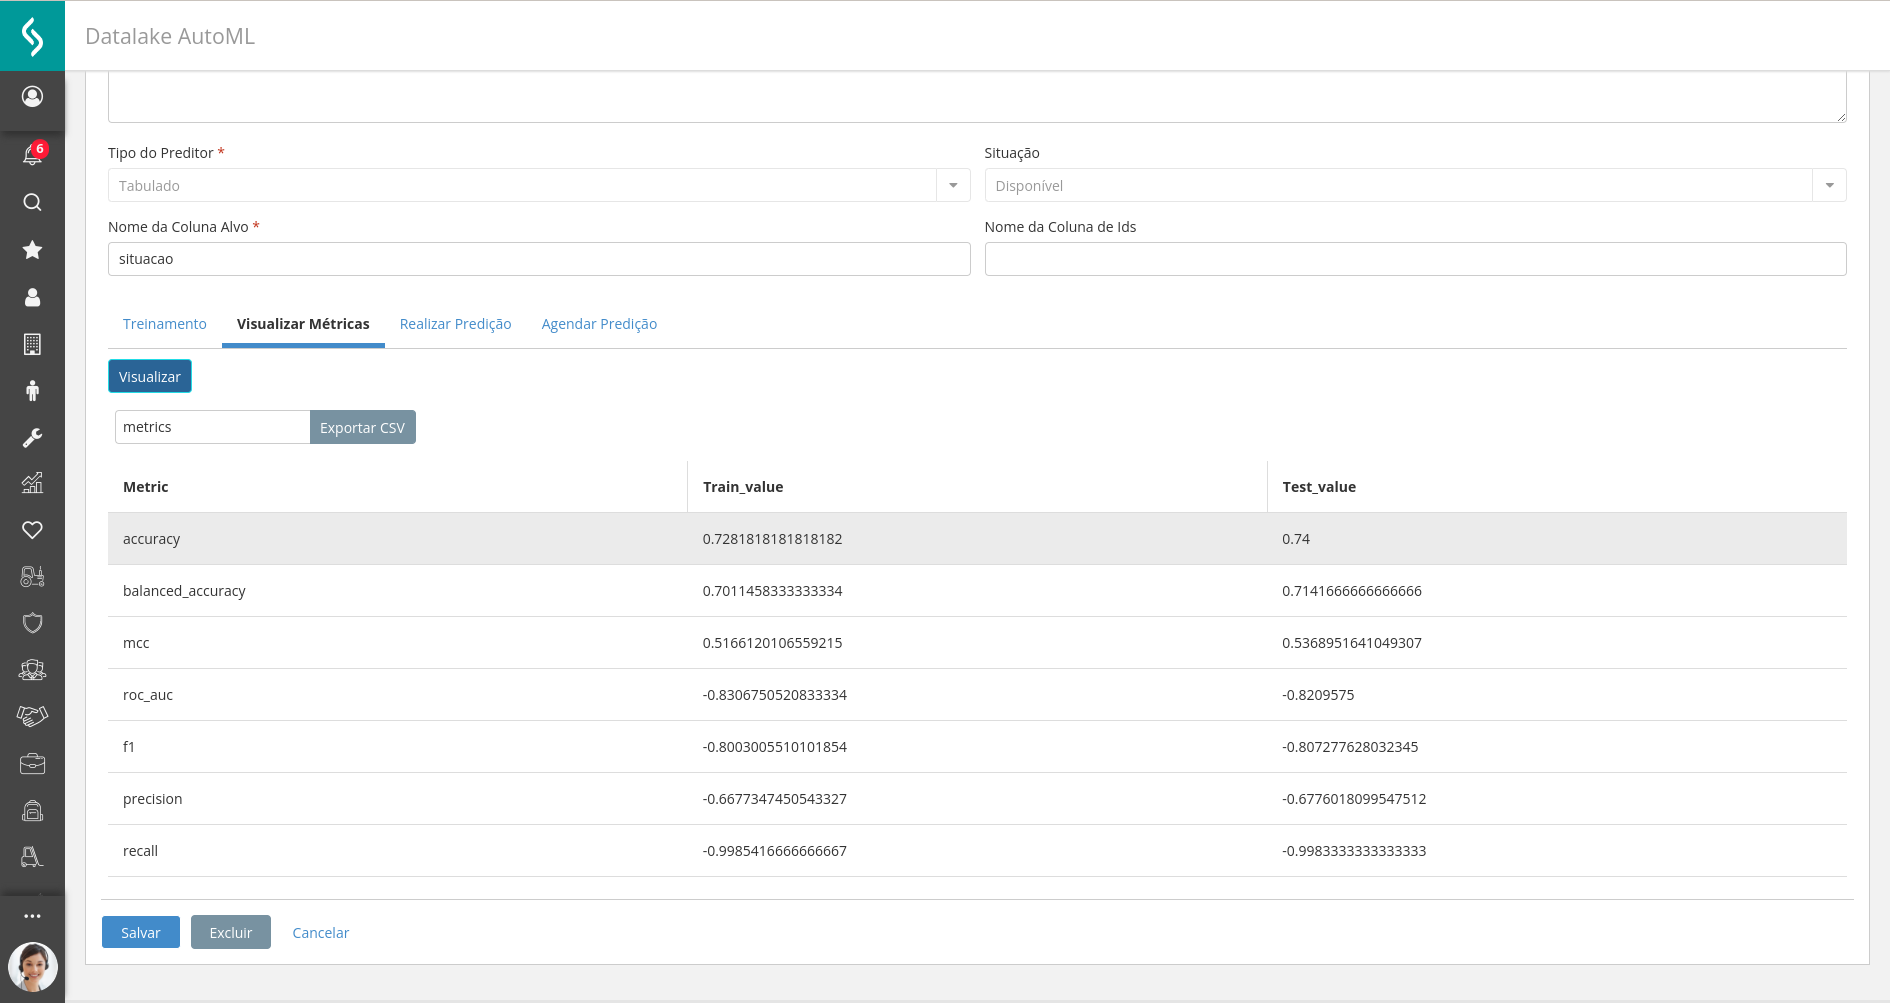
After completing the process, the user will have access to 3 new tabs, they are:View Metrics,Perform Prediction It isSchedule Prediction.
- View Metrics: View model performance metrics, accuracy, precision, among others;
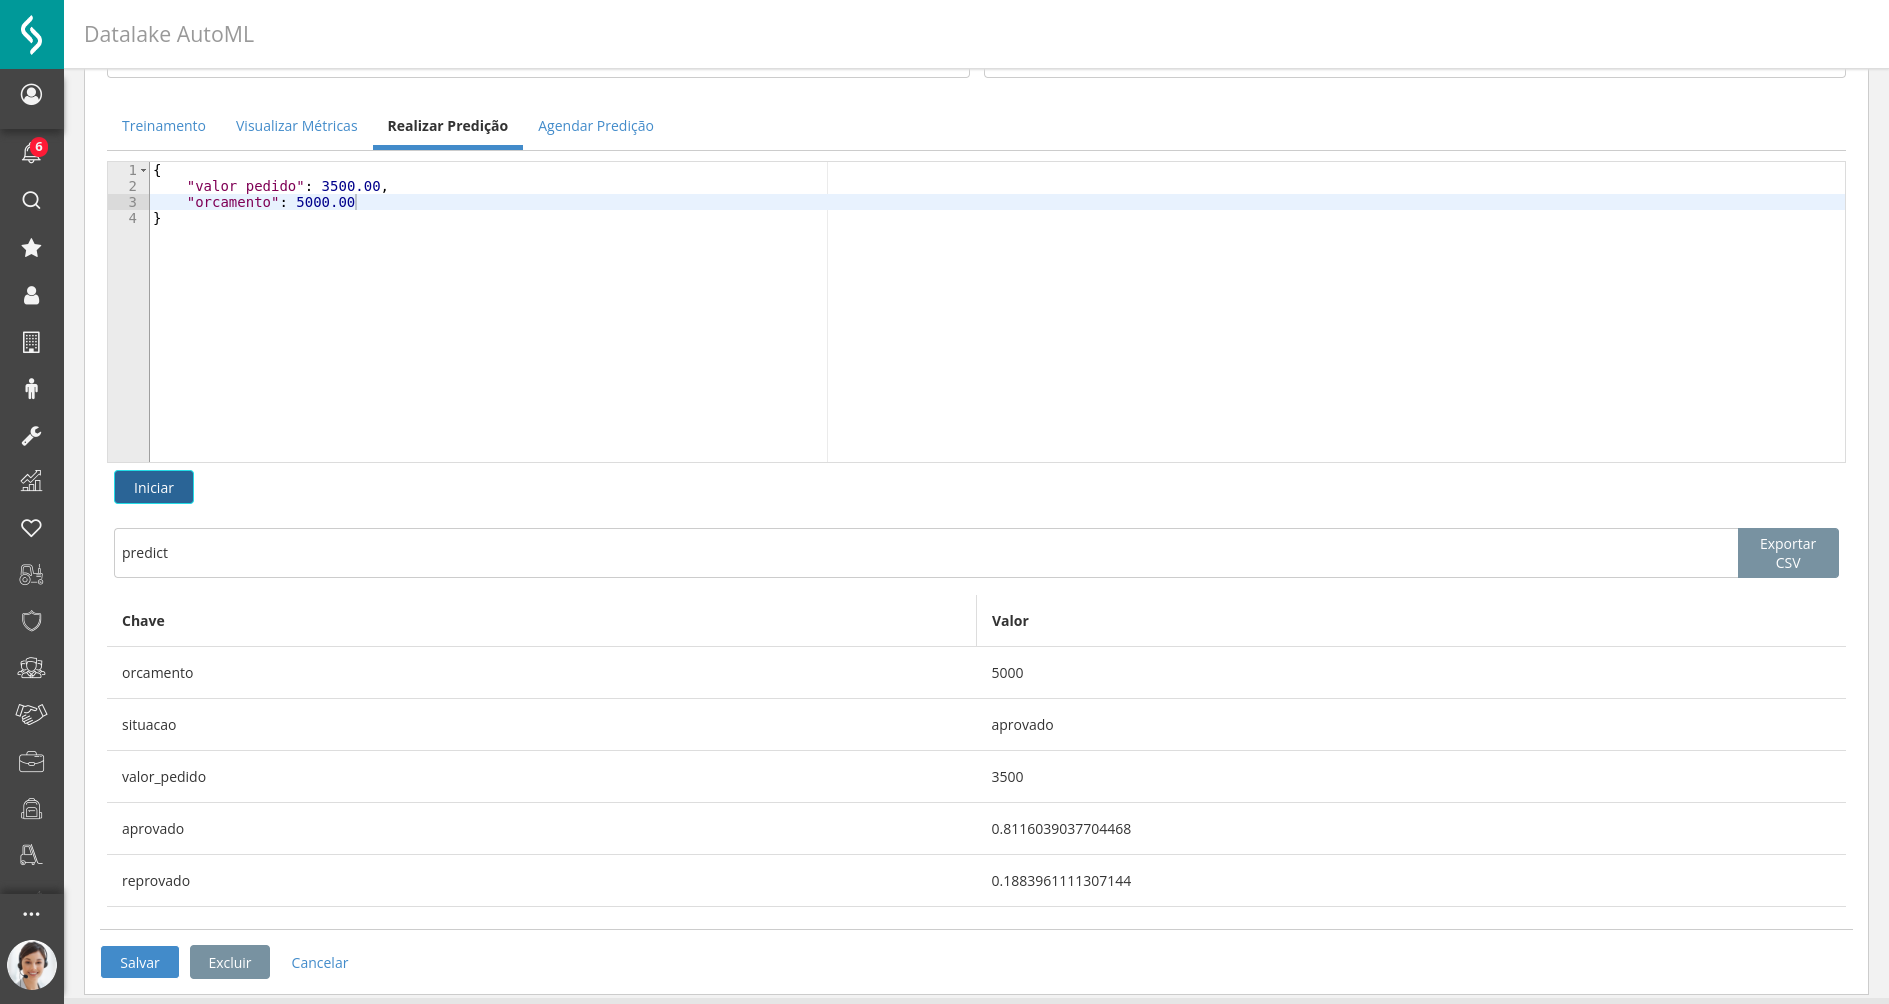
- Perform Prediction: Enter information in JSON format of the input data that the model expects to receive. When you click on start, an immediate result will be displayed, but it will not be saved;
- Schedule Prediction: To make a prediction with a larger volume of data, it is possible to add a CSV for testing by uploading a file.
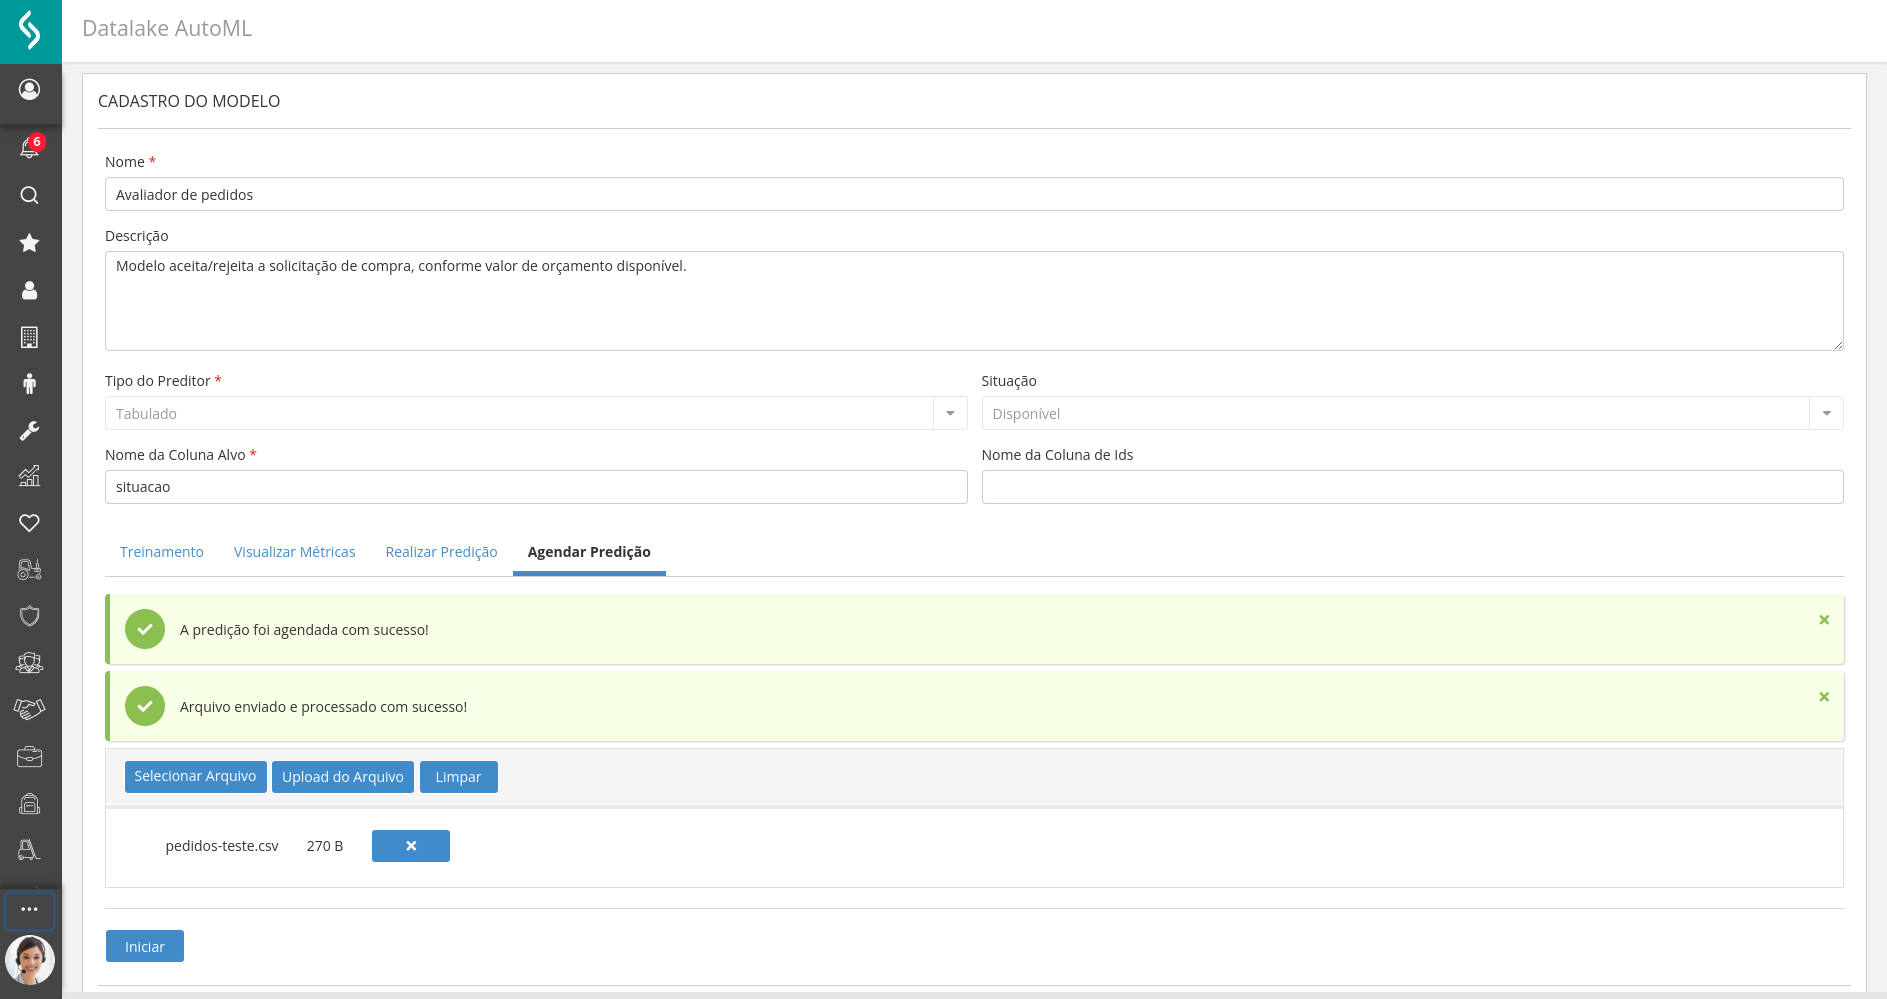
After scheduling a prediction, when the process is completed, the user will be notified, allowing them to proceed to the next tabPredictions.
Predictions
Clicking on predictions will display a list with 4 fields.
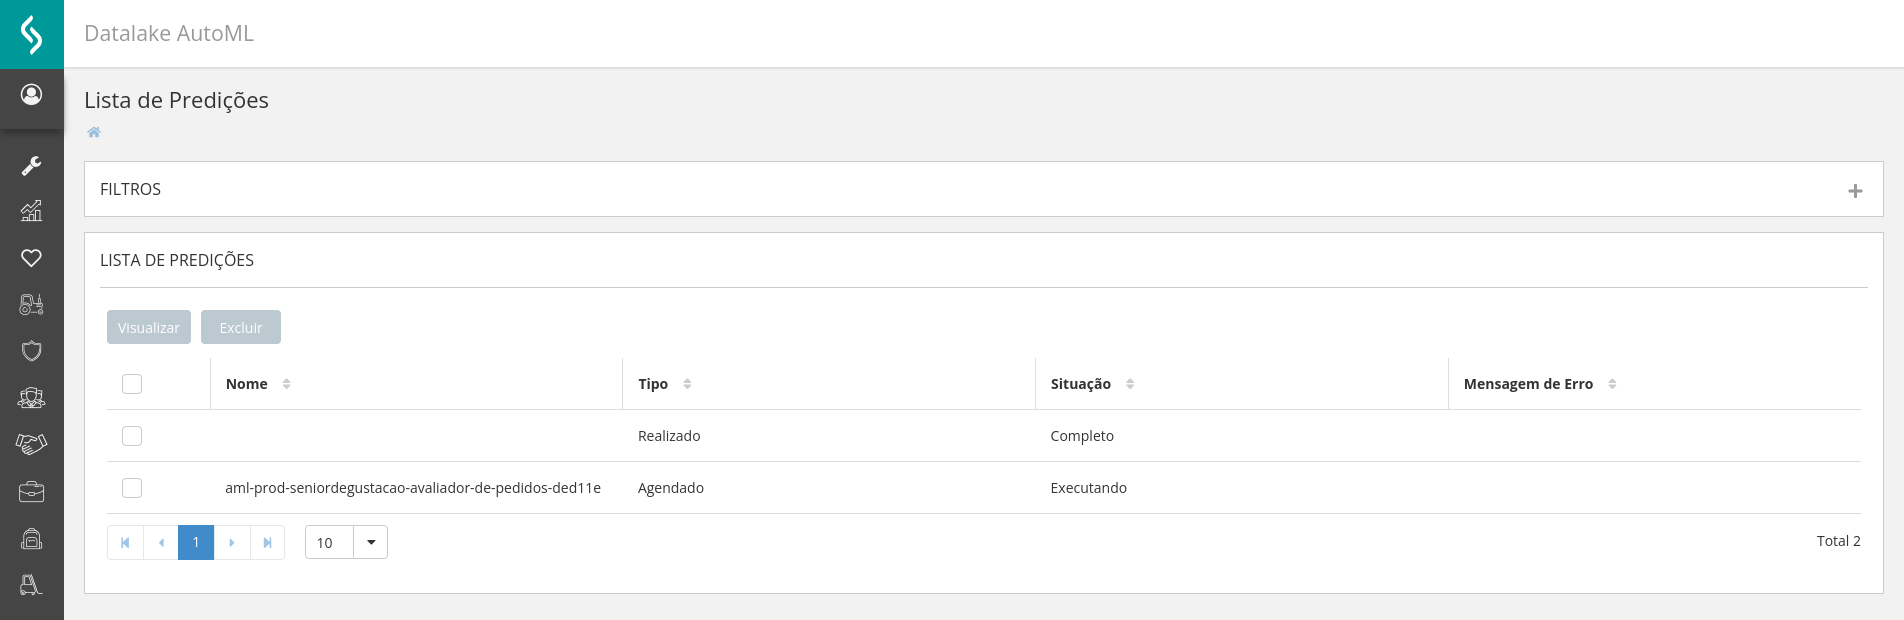
- Name: Inserted in the prediction;
- Type: Performed or scheduled;
- Status: Complete or Executing;
- Error message: If it occurred.
After completion of the execution, the user is notified within the platform, with the process complete it is possible to click on view.
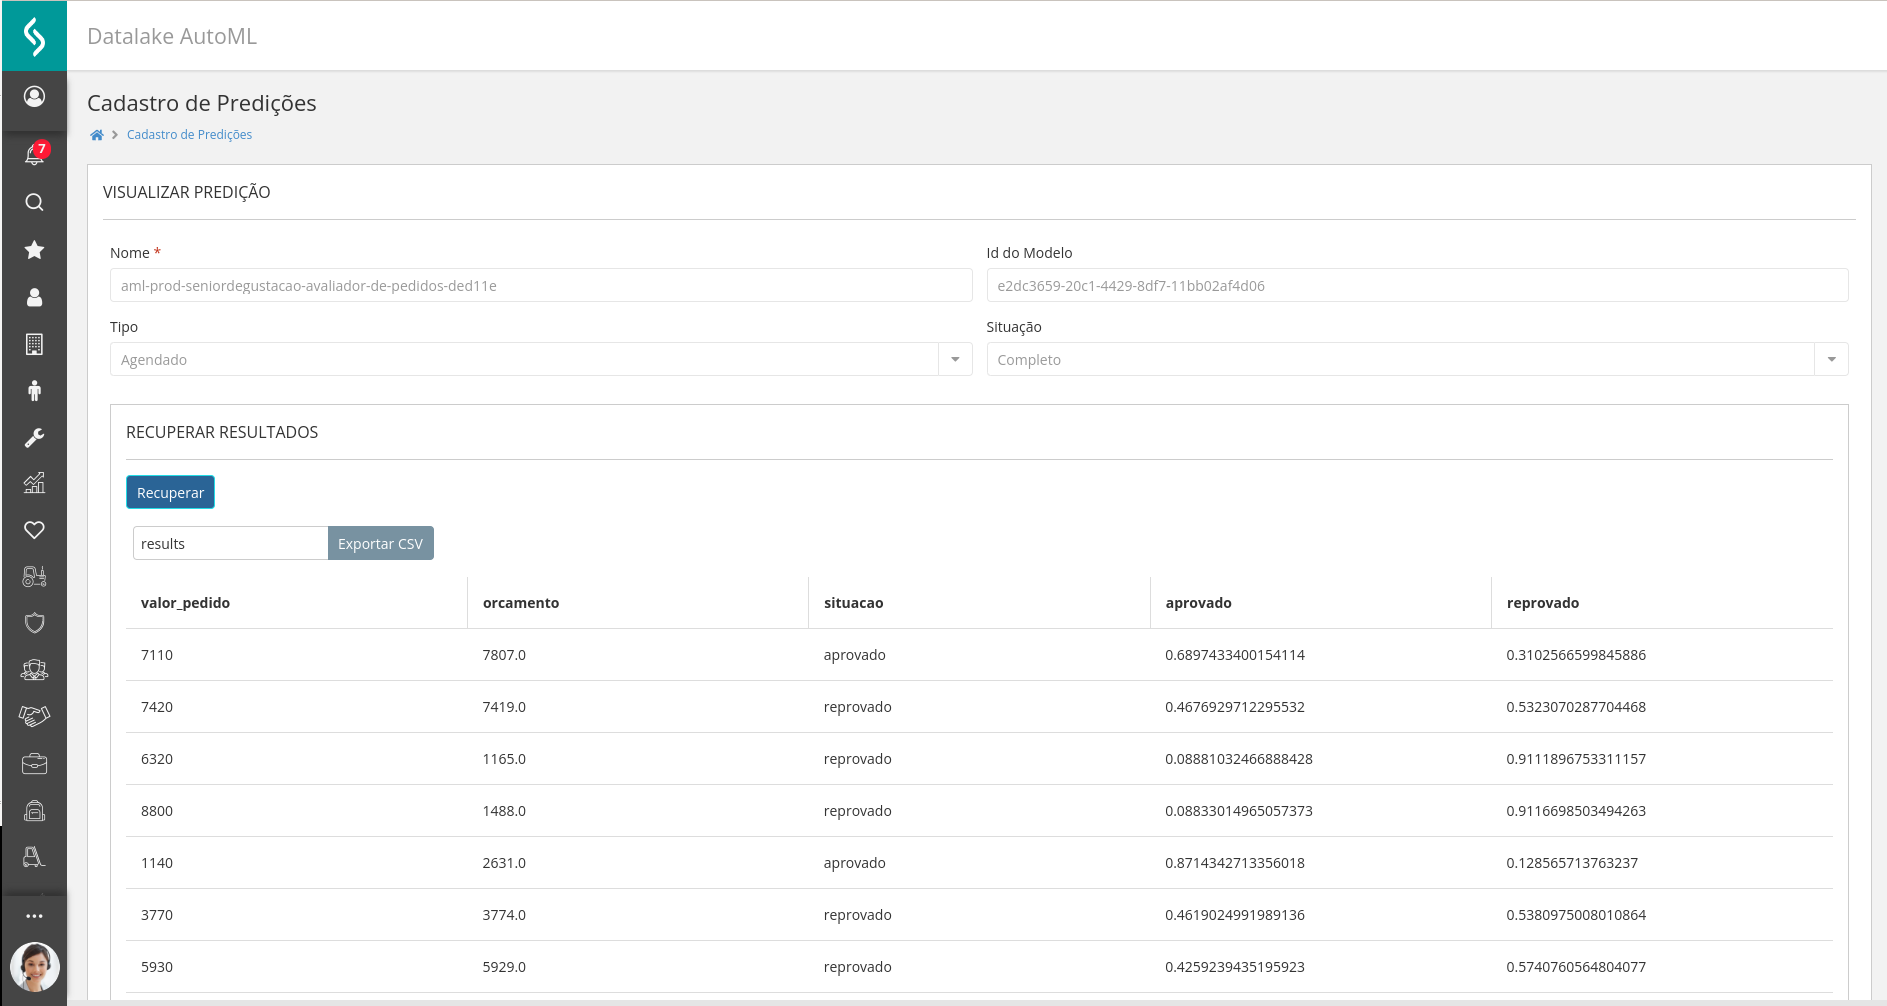
While it is possible to click on Recover, where the results are retrieved and displayed on the screen, it is also possible to export these results to a CSV.


