Users
Manage access and permission levels for each user. System administrators have an overview of the listing, while other users only have access to their own records.
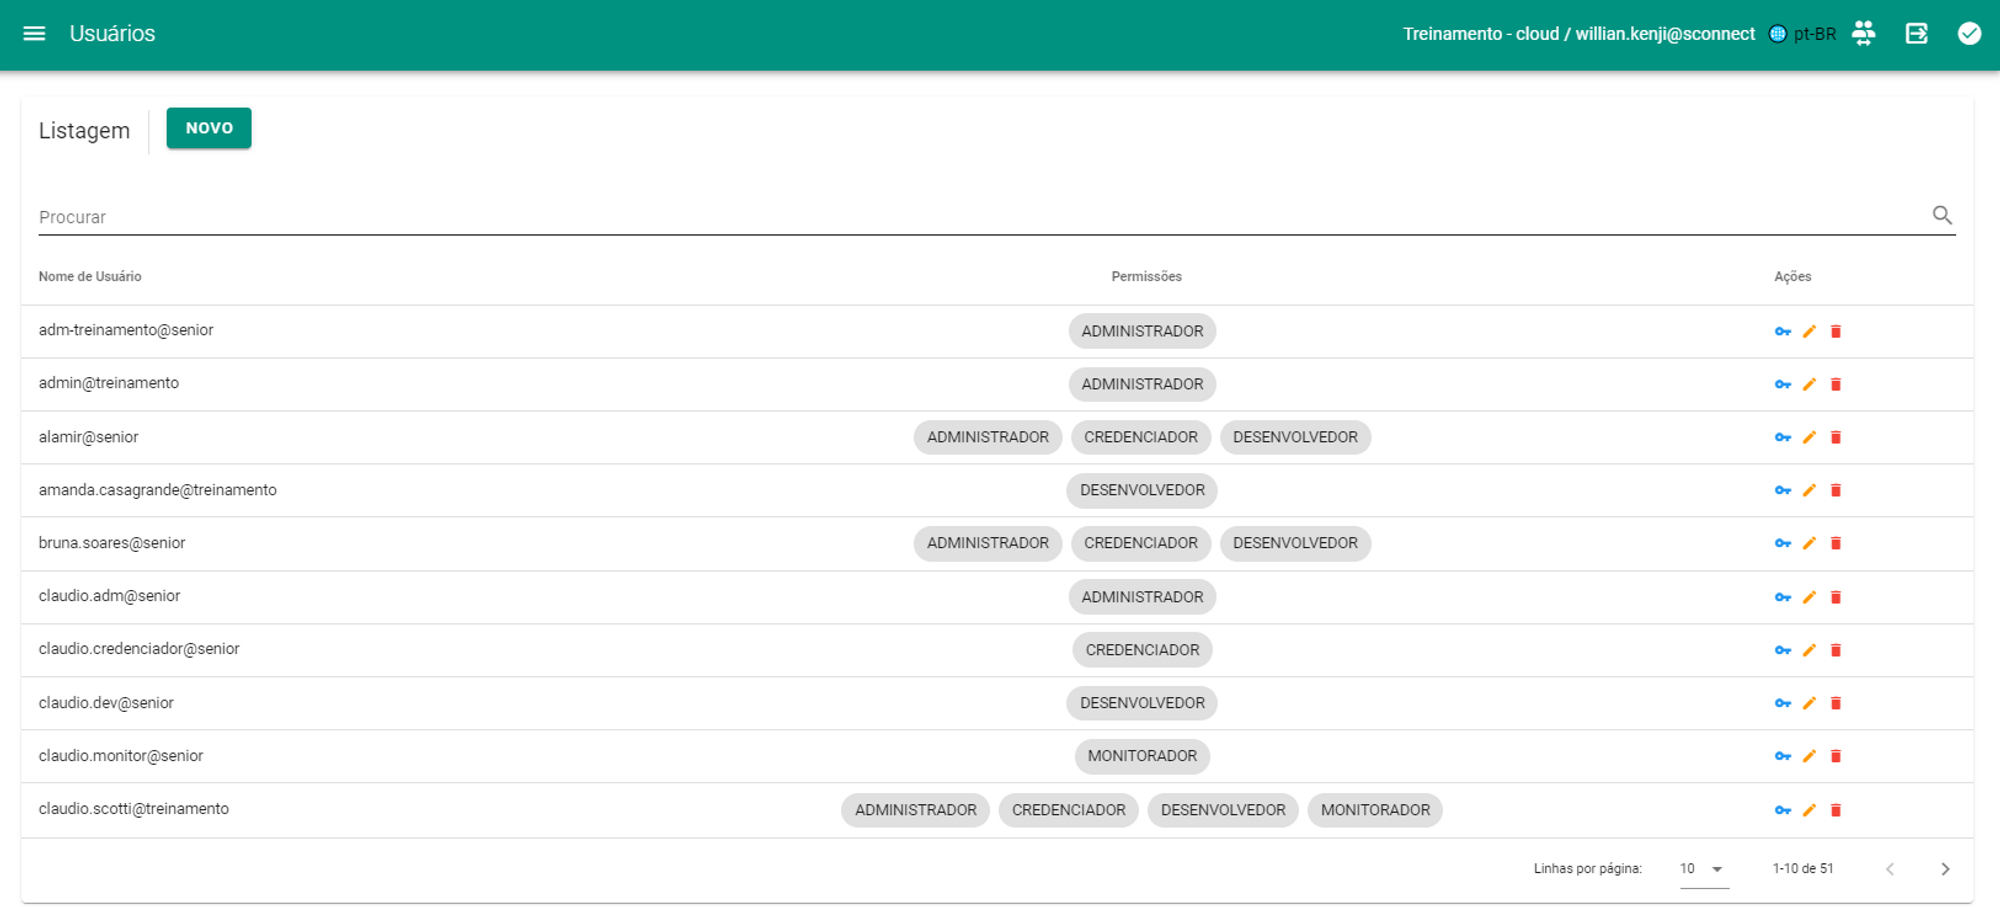
Permission and access levels
| Window | Administrator | Accreditor | Developer | Monitor |
| On |

|
|
|
|
|
News |
|
|
|
|
| Control Panel |
|
|
|
|
| Monitoring |
|
|
|
|
| API Query |

|
|
|
|
| REST Data Submission |
|
|
|
|
| Sending SOAP Data |
|
|
|
|
| Rest to SOAP |
|
|
|
|
| Integration Flow |
|
|
|
|
| DB Registration |
|
|
|
|
| Credentials |
|
|
|
|
| From/To |
|
|
|
|
| Parameters |
|
|
|
|
| Sequences |
|
|
|
|
| Email Server |
|
|
|
|
| Users |
|
|
|
|
When accessing the Root tenant for the first time, users with Supervisor permission can begin the process of creating sub-tenants.
To create a sub-tenant, simply click the buttonNEW.
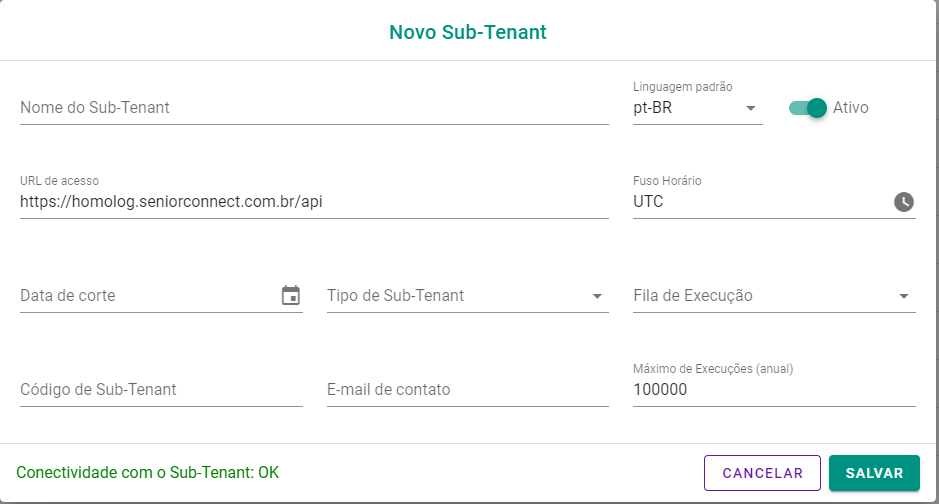
The interface for registering a new sub-tenant will open, displaying the following fields:
- Sub-Tenant Name*: Identification of the sub-tenant;
- Standard Language: Three options available - pt-BR, EN and ES;
- Access URL: Automatically filled in with the root tenant access address and can be changed if necessary;
- Time zone: Auto-filled as UTC, but can be changed;
- Cut-off Date: Date from which the tenant becomes obsolete;
- Sub-Tenant Type*: Approval (tenant for use) or Grouper (parent tenant to separate other sub-tenants);
- Execution Queue*: Sub-tenant execution priority;
- Sub-Tenant Code: Sub-tenant identification code;
- Contact Email: Email responsible for actions related to the sub-tenant;
- Maximum Executions (Annual): Limit of executions that the tenant can perform during the year.
Note
Fields marked with“*” are mandatory.
After filling in all the information, click onSave.
Important
Only users with the Supervisor permission on the Root tenant can create sub-tenants.
Once registration is complete, it will be possible to register users in the created sub-tenant. On the users screen, clickNEW.
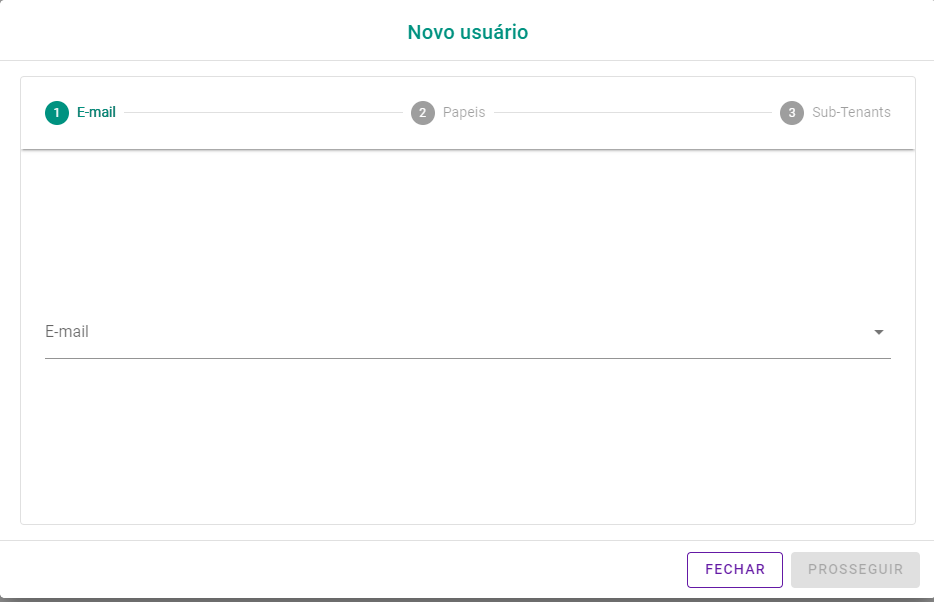
In the user registration interface, enter the email address you wish to register. By clicking Continue, you will be able to define roles for the user.
By clicking again onContinue, you will be able to choose which sub-tenant the user will be assigned to. Click onFinish to complete the process.
The user will be created according to the desired settings.
Important
User creation must be done in the Root tenant. If a change is made to the subtenants a user has access to, they will receive a password reset email. For each assigned sub-tenant, you will need to complete this process. There is currently a limit of three password changes per day.