Virtual lobby operations
To guarantee security in the utilization of the Virtual lobby, operations such as monitoring, door releases, entry registrations and credential issuances must be carried out based on the images displayed by the lobby cameras.
What you can do:
To carry out the following actions, on senior X Platform, go to Access Control and Security Management > Lobby management > Virtual lobby operations.
On senior X Platform, go to Access Control and Security Management > Lobby management > Virtual lobby operations and click on the arrow beside the name of the displayed lobby for the lobby list to be shown. Then click on the desired lobby.
If the lobby is configured to generate calls from readers and switches, a notification will show up on the screen with some data, such as information about the reader or switch, lobby and the person who originated the call. In the case of a switch call, the person who originated the call is not displayed in the notification.
To handle the call, click on Open call. If the call is not immediately handled, it becomes pending in the Open Calls area.
This panel is only displayed when the lobby is configured to generate calls from readers and switches and it has a call that has not been handled within 20 seconds after its request.
In the Open Calls section, click on the desired call and the details will be shown at the right side of the screen. Based on the information, the request can be answered:
- Allow access: triggers actions, such as issuing a new credential or registering a leave, depending on whats is configured for the lobby;
- Deny access: no action occurs, the call is finished, the person does not receive any return and also will not be able to move around through the locations.
When there are no requests in time to be handled, the Open Calls area is not displayed.
An entry is registered when the person that must access the lobby already has an access credential:
- In the Movement section, click on Entry register;
- Select a Document type and enter its number or enter part of the person's Name. Click on Next, and then;
- If desired, add the person's Details or just click on Next;
- Define the person's Role and the Role validity. Optionally, select the Visited person;
- Click on Register entry.
- In the Movement area, click on Leave register;
- Enter part of the person's Name or document number, find him/her, click on its register and click on Next;
- Confirm the data and then click on Register leave.
The available activations may vary, depending on what is registered in Ronda senior X for each ordinance. Access the Actions section, click on the desired activation and monitor via the camera whether it occurred successfully.
In the Details section, click on Open entries and the people who entered through the lobby will be shown. If desired, use the Search field to enter part of the name or document of a person that you want to find among the associated people. Then click on the person's name to view his/her registered information.
Go back to the main lobby screen at any time.
In the Details section, click on Associated people and the people associated with the lobby are displayed. If desired, use the Search field to enter part of the name or document of a person that you want to find among the associated people. Then click on the person to view his/her registered information.
Go back to the main lobby screen at any time.
In the Details section, click on Information. The address and phone number of the Lobby are displayed, if registered.
Note
To access the virtual lobby, the user must have permission to view lobbies.
Add any camera associated with the selected virtual lobby.
In the camera mosaic, find a space where the Add a camera option is available, click on Select a camera and then on the desired camera.
Move the mouse cursor over the camera that you wish to hide, to make the menu show up at the upper right section. Click on this menu and then on Hide camera.
Choose any camera associated with the selected virtual lobby.
Move the mouse cursor over the camera that you wish to hide, to make the menu show up at the upper right section. Click on this menu and then on the name of the desired camera.
In the lower right part of the camera mosaic, click on the  icon.
icon.
Then click on the icon that represents the desired camera display method:
In Device Monitoring, devices linked to all physical locations are shown:
- In the menu bar on the left, click on the Device Monitoring icon;
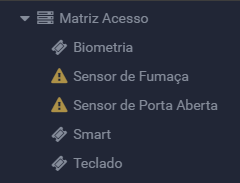
- Devices are shown with signage in different colors:
Icon Status 
Offline 
Online, but with an alert 
Online and without problems - When clicking on the managing device, all devices (readers, inputs and outputs) connected to it will be displayed. Devices that are alarmed will have a flashing yellow triangle next to them:
- Click on connected devices for details;
This screen also has the filter feature, which allows you to select the display of devices by physical location and device status.
- Monitor accesses: view the list of people who accessed or tried to access any physical location. In the menu bar, click on the Access monitoring icon. Optionally, use the Filters panel to refine the accesses that are displayed and, if desired, move the mouse cursor over the person's name to see his/her photo;
- Consult notifications: consult the notifications related to all physical locations. In the menu bar, click on the Notification icon. Then click on the desired notification to be directed to the Monitoring dashboard of the corresponding physical location;
- Access Web Monitor: at the top of the menu bar, click on the iconWeb Monitor;
- Consult the access calls log: in the menu bar, click on the Call Log icon. If desired, set filters by clicking on Apply filter to display the information;
- Maximize the window: at the lower part of the menu bar, click on the Maximization icon. To exit full screen mode, press "Esc" or click on the aforementioned icon again;
- Leave the system: at the lower part of the menu bar, click on your photo. This shows the Exit icon - click on it.