The pre-employment process of the Colabbe system can be natively integrated with the admission module of Senior's Personnel Administration. In this way, the data obtained in the onboarding process of the new employee will be reused by the Personnel Administration, where the admission process will be concluded.
prerequisites
Personnel Administration module implemented in one of these versions:
6.10.1.2 or newer
6.2.35.1 or newer
6.2.34.33 or newer
6.2.33.97 or newer
Observation
APhotograph of new collaborators is integrated only from the versions6.10.1.19 It is 6.2.35.98. If you want the photo to be integrated into the Colabbe system for Personnel Administration, you must use one of these versions.
Access to the server where Personnel Administration is installed.
Have the People routine enabled in Personnel Administration.
This configuration can be checked by checkingEnable people routine, on the Personnel Administration Assignments screen: Miscellaneous > Assignments > People tab (FR000ASS)
If the company manages dependents in the Colabbe system, it is necessary to have the Dependents routine enabled in Recruitment and Selection (version XT).
This configuration can be checked by checkingUse Dependents, on the Recruitment and Selection General Settings screen: Selection > Settings > General (FR126DEF)
Settings to enable the integration
XWe recommend that these settings be made by the system administrator or someone from the company's IT department.
Observation
If this configuration is done on a client that uses People Management | HCM (version 6) completely in the Cloud, you will needopen a call for Senior TI to carry out these configurations.
Open the Senior Settings Center. To access it, run the applicationSeniorConfigCenter.exe, located in the same directory where People Management | HCM (on-premise) was installed (example: c:\Senior\SeniorConfigCenter.exe).
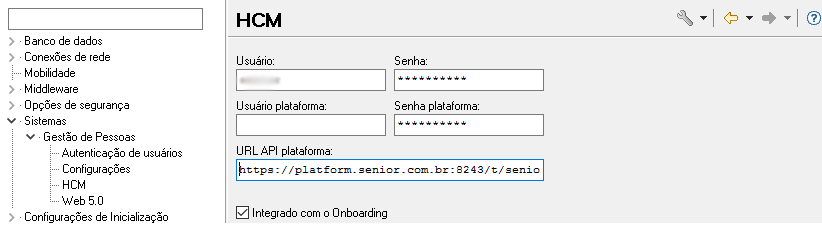
In SeniorConfigCenter, access the HCM settings screen through the menu:Systems > People Management > HCM.
On the HCM settings screen, fill in the fields:
platform user
It isplatform password: senior X Platform administrator user access credentialsIf you forgot or want to reset the platform administrator user password, do theprocedure described in our Knowledge Base.
t )Check the checkboxIntegrated with Onboarding. What to do if the fields above are unavailable:
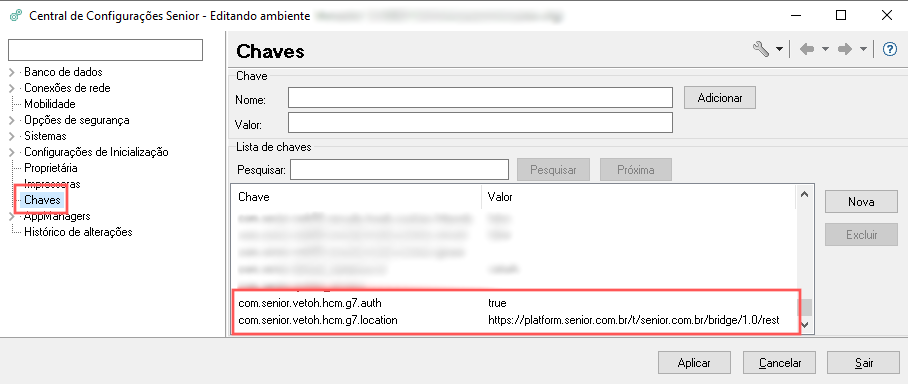
If the HCM settings fields are not available, it may be necessary toregister the keys of communication between the environment and the senior X platform.
To do this, access the menu
K
eys
and add the following records:com.senior.vetoh.hcm.g7.auth
Still in SeniorConfigCenter, access the menu:Network Connections > Internet Access. On this screen, make sure that the flagUse SSLbe configured with the optionEver.
If the Personnel Administration module is running, restart it for the changes to take effect.
In the Senior Database Center (CBDS ), run the SQL commands below: INSERTto register atype of personnel requisition
standardAttention! Before running the command below, do aSELECT to check if these values are already registered in the table. If so,it is not necessaryINSERT run this.
INSERTto register the general definitions and integrate thedependents originated by Colabbe
This operation will depend on the modules contained in the Owner of the environment being configured:
If there is only the Personnel Administration module (without Recruitment & Selection):
Attention! the tableR126DEF can only haveone option registered. Therefore, it is first necessary to make aSELECT and, if there is already a record with the option'N' in columnUSADEP, this record must be deleted, and then theINSERT below must be executed.
INSERT INTO R126DEF (EFEFIC, USADEP)VALUES (two,'S')
If there are Personnel Administration and Recruitment & Selection modules:
In Recruitment & Selection, make sure that the optionY - Yes is marked in the fieldUse Dependents.
can be found on the Candidate tab of the General Settings screen: Selection > Settings > General (FRDEFNRS).
How to make an admission integrated with thePersonnel Administration
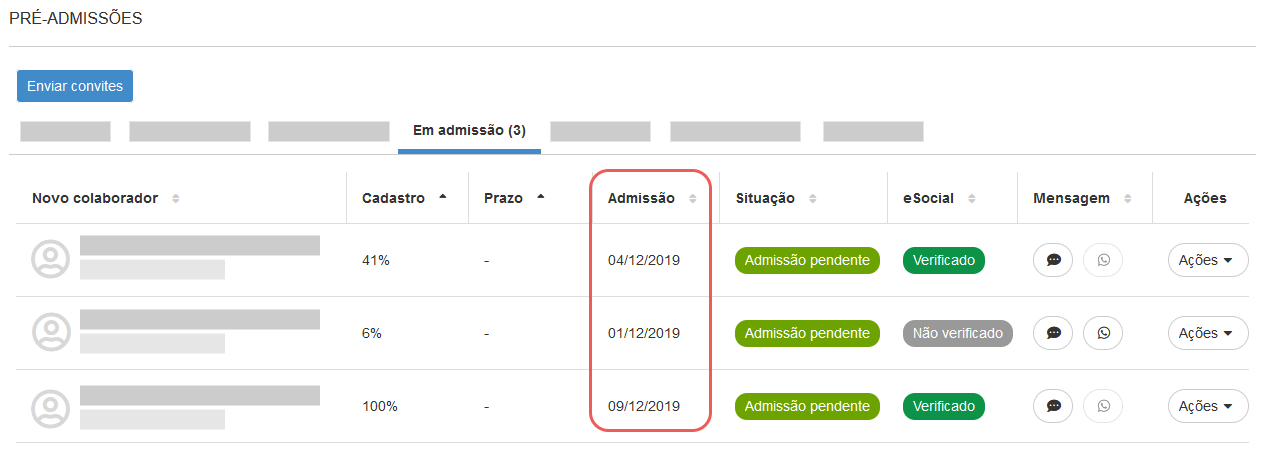
1. Check which employees are in admission situation
At theColabbe's system, see if any contributors are listed under the On Hire tab. If so, make a note of theadmission date these people—you'll need this information later.
2. Search for pre-admissions on the Onboarding screen
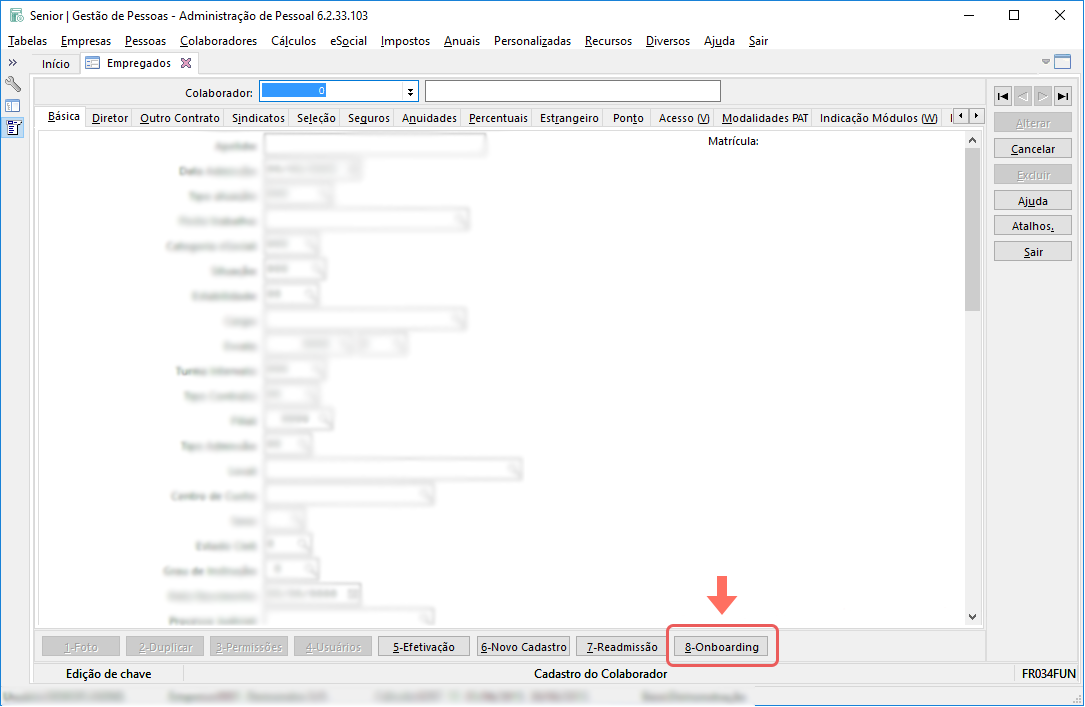
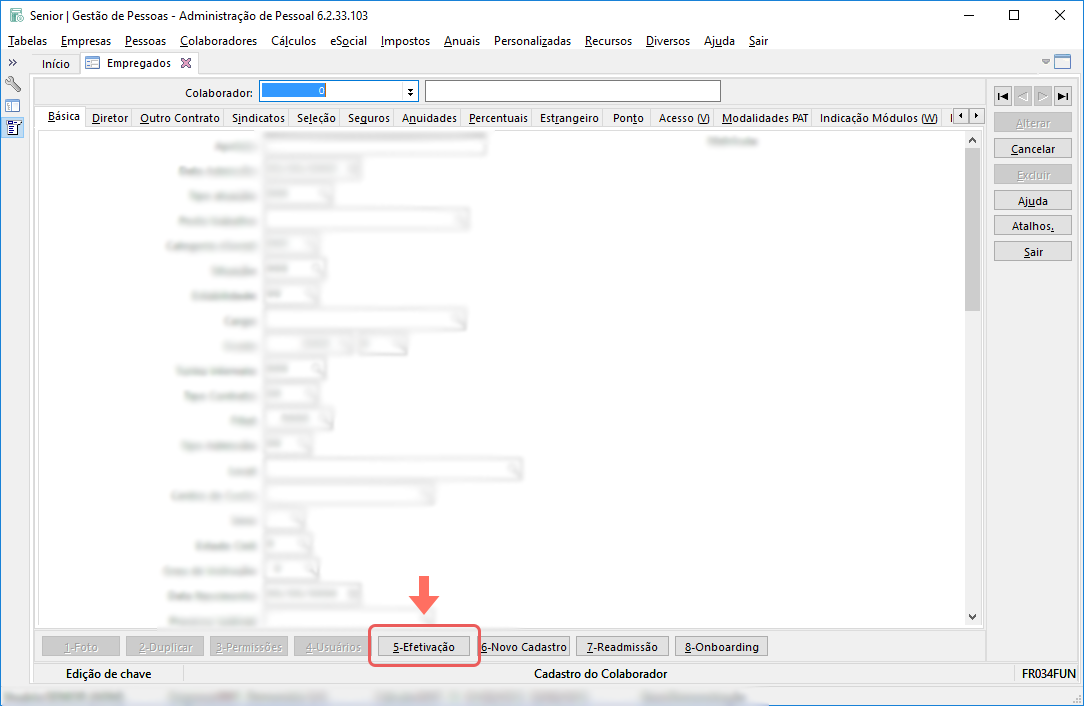
In the Personnel Administration module, access the Employees' Basic File, at: Employees > Registration Form > Employees (FR034FUN).
In the footer, clickOnboarding:
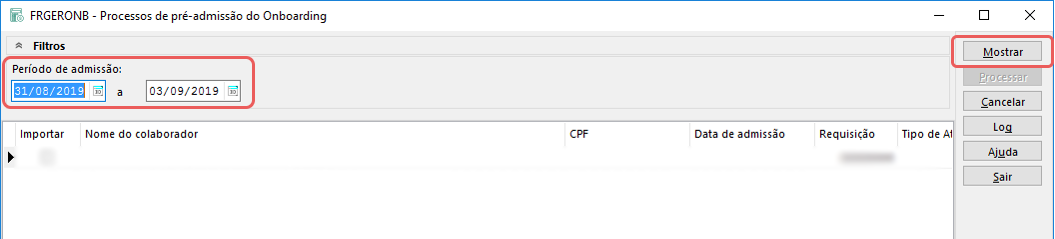
The Onboarding Pre-Admission Processes screen will be displayed (FRGERONB).
In the filters, inform a period that covers theexpected date of admission contained in the Digital Admission module.
Then click onShow to load the pending pre-admissions list:
3. Process the found pre-admissions
This step will depend on whether you have the Recruitment and Selection (R&S) module of the XT version integrated with the solution:
Without integration with R&S:
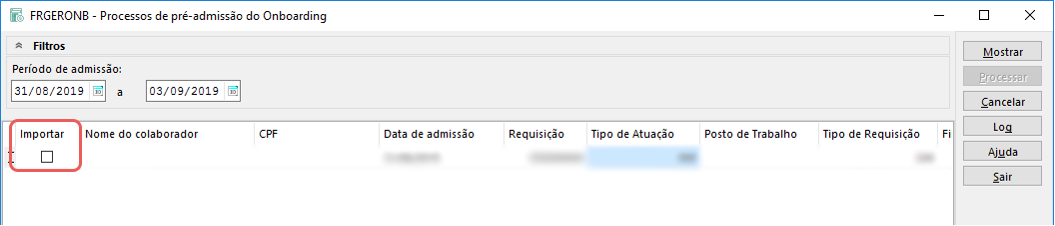
Select column checkboxesimport, next to pre-admissions:
Then enter the additional data:
Type of Activity: 1
Request Type: 1
Workstation: default or registered value for each employee. When filling in the job, the other columns will be filled in automatically. If this does not happen, it will be necessary to fill in the other columns manually.
Integrated with R&S:
Just select column checkboxesimport, next to pre-admissions:
so that the columnRequest load automatically (coming from Recruitment and Selection) it is necessary that these conditions are met:
The vacancy and candidate must be present in the Approved tab.
In Recruitment and Selection (R&S):
The registration of the external candidate must have the CPF informed. That is, the employee must have informed the CPF in his Recruitment and Selection registration. Therefore, it is recommended that the CPF field be mandatory in the R&S.
After filling in the information above — with or without R&S integration, click onProcess.
Also check thelog, to consult success messages or possible processing errors.
4. Finalize the hiring of the employee
Go back to the employees' Basic Sheet (FR034FUN) and click onEffectiveness:
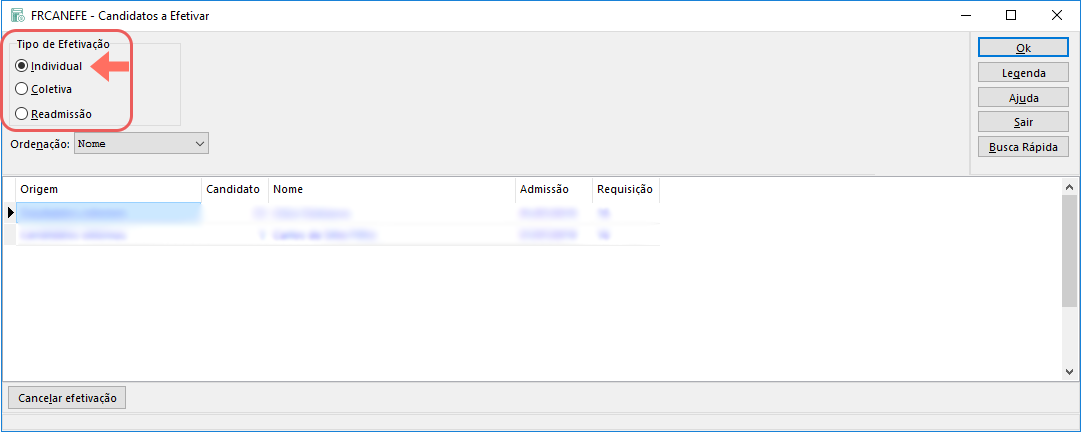
The Candidates to be hired screen will be displayed (FRCANEFE).
On this screen, select theindividual effect type, select the employee you want to hire and click onOK:
Finally, go back to the Basic Sheet screen and fill in the missing information in the employee's registration.
With this, the inclusion of the employee in the system is completed.
How to integrate custom fields
If you have custom fields in Personnel Administration, you can integrate their data into Colabbe custom fields.
To do this, you need to make theconnection between base fields of the two systems.
XWe recommend that these settings be made by the system administrator or someone from the company's IT department.
1. Create custom fields in Personnel Administration
If custom fields have already been created in Personnel Administration, see step 2 below.
Otherwise, create the fields using the appSenior Database Center (CBDS). To learn more about this procedure, check out thedocumentation of custom fields in the Technology Manual.
Possible solutions for errors when creating fields with CBDS
If the processing log shows errors in the persistence of custom fields, it may be necessary to run thecleaning of objects and thedatabase consistency.
Example of error generated in the log, after persisting the fields:
Status of stored procedure HR_FOLPRF : Invalid.
Note that object cleanup and base consistency must be performed withcaution.
To learn more about these procedures, see the documentation in the Technology Handbook:
Deletion of objects from the database
Consist of database
Relationship between Colabbe and Personnel Administration tables that allow customization
Personnel Administration module tables
Colabbe tables
R034FUN
bankAccount
civilCertificate
chn
cns
CPF
ctps
degreeOfEducation
dnv
hiringMedicalExam
inviteModelContract
passport
personalAddressBRA
personalBasic
personalBirthPlace
step
proofOfEnrollment
reservist
rg
rich
vote
R034CPL
personalComplementary
personalEmail
personal phone
R036DEP
dependentBasic
sus
vaccinationBooklet
CPF
Ric
proofOfEnrollment
civilCertificate
2. Create Colabbe custom fields
After creating custom fields in Personnel Administration, you need to create them in senior X Platform and link the two databases.
For instructions on how to perform this step, seeColabbe custom fields documentation.
Important
Custom fields created in the Digital Admission solution must have exactly the same name, same type, same size, mask, etc., as the fields in the Personnel Administration module. This is important as any divergence can result in failures in the integration of field values.
It is important that the log is always consulted, to ensure that the integration occurred correctly. The log is generated in: Miscellaneous > Log > Processing, searching for the type of processing 199 - Onboarding - Effectiveness of collaborators.