Analytics Studio — Tutorial
Step 3 of 3 — Create and configure a page
After configuring the widget, you need to create apage to add it. A page is a space where you can add and organize the visualization of different components, such as:
- Widgets
- Analytics Cards
- Shortcut links (URLs)
- Tabs (tabs)
On the senior X Platform, access the menuTechnology > Customization > Pages > New Page.
When starting to register the page, make the following settings:
1. Page Information:
- Page name: Enter a name that easily describes and identifies the page.
- Positioning: indicate the way the components should be positioned on the page:
- Absolute : the height of the line will be predefined, each unit will have a fixed value in pixels.
- Relative: the height of the line will be relative. That is, 12 height units will be equal to 100% of the screen height.
- Credentials: If this option is enabled, user credentials will be sent to components inserted on the page. Some components may need credentials to correctly display their information, but the option should only be checked on trusted components.
- toolbar
- : If this o
- ption is enabled, a bar will be displayed on the page with the options:
- Automa
In this tutorial, positioning will be usedAbsolute and the optionsCredentials It istoolbar will remaindisabled:

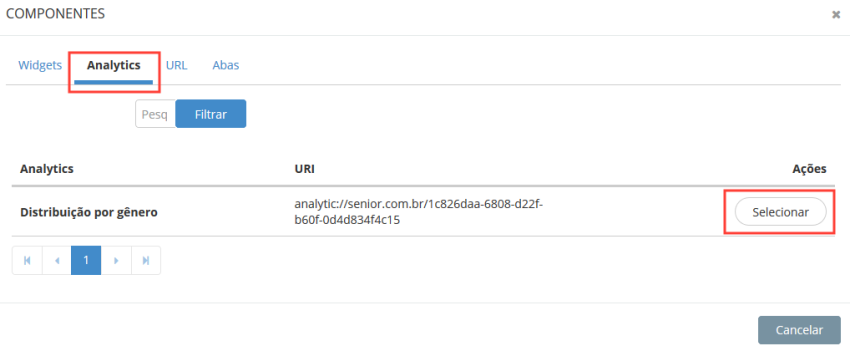
2. Components:
Click on the button Component to see the list of available components. Next to the desired component, clickSelect to add it to the page.
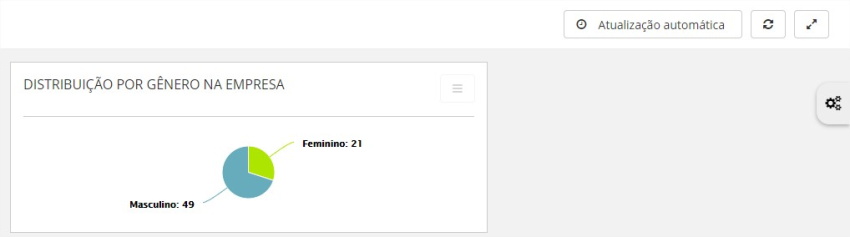
In this example, the widget component will be insertedDistribution by gender in the company, which was created in the previous step of this tutorial:
Observation
Custom widgets you create will appear in theAnalytics tab. The Widgets tab only displays components that are created by default by the products.
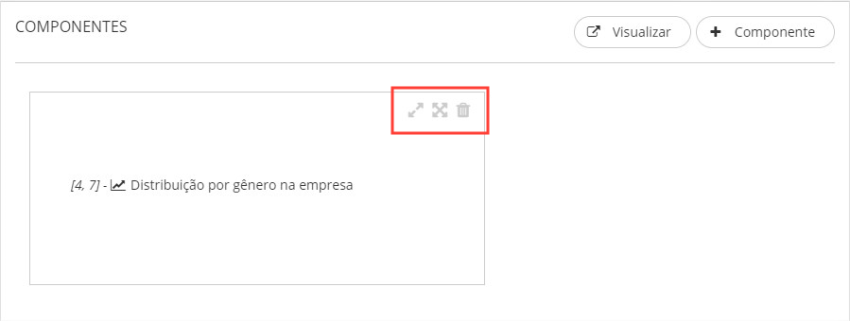
After adding the component, it will be displayed on the screen and can be resized and moved however you want:
3. View the page:
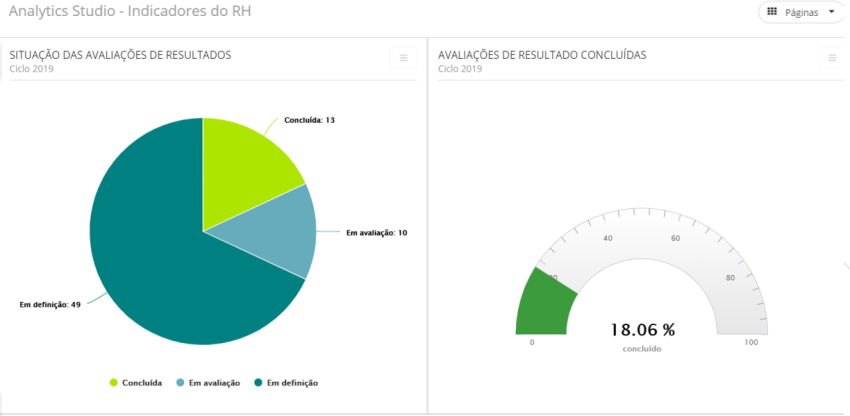
Click on the button To view to open a new browser tab with a preview of how the page will appear, including the data that was selected:
Finally, clickTo save to save the changes and create the page.
Next steps: Create more visions and share with others
Create more widgets
In this tutorial you saw how to create a widget with a simplified view of the distribution of people by gender in a company.
Now you can create other widgets, extracting different data provided by the datasets and crossing the information in any way you want.
Manage and share your page with others
Add new components and widgets to your page to create a complete management view.
After that, you can edit and share this page with other system users:
- On the senior X Platform, access the menuTechnology > Customization > Pages > Manage
- All pages that have been created will be listed. Next to each page, use the buttonActions forTo edit orcopy access address (URL):
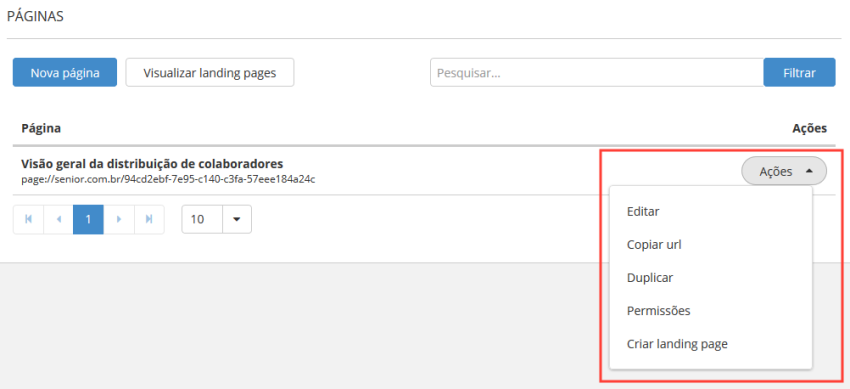
With the page address you can create shortcut links in your browser and on the senior X platform itself, facilitating access to information.
Create landing pages and see analytics on your home screen
Using the pages that were created, buildlanding pages and set them as the home screen for specific roles and users.
- On the senior X Platform, access the menuTechnology > Customization > Pages > Landing Pages
From this screen you can create new landing pages or edit existing ones.


