People
Register and search for people, and view all their information (general data, document,telephone, email). Once the person is registered, you can add them to agroup,to schedule visits and issuetemporary access credentials for her, among other operations.
Through this screen, administrators may create and manage users, which may be associated with people to allow them to access the system.
What you can do:
The system has a default person registered, the administrator (Admin), who may be modified at any moment. To register a person:
- On senior X Platform, go to Access Control and Security Management > General registers > People;
- Click on Add;
- In General Data, fill in the required registration fields, marked with an asterisk. In Document type, the documents defined as mandatory will be displayed. For a type to appear in this field, the itemMandatory document must be marked in the registrationtypes of documents;ObservationThe Person's time slot information box, which appears in the registration, aims to show the time slots that are linked to a user integrated with Ronda Senior and/or People Management | HCM.
- After filling in the necessary fields, click on Save. A screen with the person information will be displayed;
- Associate the person with one or more roles. In the Roles section, click on Add and, once again, on Add. Find the Name of the role that you wish to associate with the person and fill in the validity Start date and End date of this role. Then return to the person data screen by clicking on the person's name. In the Roles section, you can also add a suspension to the role;
- If desired, add the person to one or more groups. In the Groups section, click on Add, search for the group name and click on it. Add as many groups as needed. Then return to the person data screen by clicking on the person's name;
- If it is necessary to generate notifications when this person accesses, indicate this in the Notifications section. click inTo add and then choose theType notification that will be sent (by email or via senior X Platform). After that, select the people and/or groups that will be notified when that person is present;
- If needed, associate an organizational structure. In the Organizational Structures section, clickTo add, search for the name of the structure and click on it. Then return to the person data screen by clicking on the person's name;
- To add a main access credential, in the Main Access Credentials section, click on Add credential. Then clickTo add and enter the type of credential (Biometry,Badge and/orFacial) and fill in the requested data:
- For badges, the system allows you to register a credential for each type of technology (Bars, Proximity and Smart Card);
- In the case of biometrics, the system uses theSeniorReaders for registration;
- For facials, the system allows you to create a facial credential with your profile photo. For guidance on taking appropriate profile photos, see theRegistering photos for facial recognition ;
- If the system is being operated by an administrator, he/she can add a user to the registered person, which grants a username and password to access the system. Click on the buttonTo add from the User section and fill in the necessary information. If the user is the administrator, select the administrator option. If not, leave it blank. After completing the configuration, clickTo save;
- Under the person's photo, the indexing date of this photo is displayed. If its reindexing is necessary, click on Reindex photo.
In cases of users who have integration with the Ronda Senior and/or People Management systems | HCM, the role that the person already has will be displayed on the screen, marked as Integrated. In these cases, the user cannot edit or delete this association, except if these actions are done on the Integrator.
The role suspension may also only be created, modified or deleted from integrated associations if these actions come from the integrator.
After a person is registered, information may be added or modified by finding the desired register at the Person Consultation screen and clicking on the Edit person data button. This way a user, role, group or credential, among others, can be added to an already existing person.
The dynamic view is a way of querying different records in some tables, using filters and visualization in different ways. As with reports, you can print them in CSV, PDF or another existing format and this report can be sent by email. This feature is only available to Ronda senior X administrators.
When configuring the dynamic view for the sam_pessoa view, it will contain data from the fieldsphoto_ok_for_recognition It is photo_modified_by, through this configuration it will be possible to check the results of the analysis of the person's photo to be used in facial recognition.
The fieldphoto_ok_for_recognition may contain the information "true" (true) or "false" (false). The information will be "true" when the photo is correct to be validated by the facial recognition device and "false" when it is not correct.
To block a person, in General registers > People, find the person and click on Block person, fill in the Reason for blocking and what are the Unblocking procedures. When a person is blocked:
- All his/her roles will be finished. Their end date will be the current date and time minus one minute;
- All his/her credentials will be finished, in a way similar to the roles;
- If the person has access credit ranges, they will be removed;
- If the person has a user to access the system, it will be deleted;
- The person will receive the "Blocked" status, which prevents him/her from gaining new roles and credentials.
To restore these access authorizations and locate the person on the system again, he/she must be unblocked by the administrator. Then the administrator must search for the person, click on Unblock and provide a Justification for unblocking.
Note
Operations carried out through the People screen, when they affect third-party credentials, will only be done in the Ronda senior X system itself. In other words, this screen is not integrated with the Ronda Senior system. If a third-party credential is canceled, terminated or blocked here, it will not affect the same credential in Ronda Senior, which will remain active and may generate inconsistencies. In this case, we recommend closing the credential on the final contract history screen (in Third Party Management) or blocking the third party (in Ronda Senior).
Temporary blocking
If a person is blocked in the Senior Round, they will have the Temporary Blocked status in Senior Round On the other hand, when unblocking it in Ronda Senior, the person will also have their temporary blockage ended in Ronda senior X, their status is changed to Active and all suspensions generated by the blockage are ended.
This is done through the Integrator and does not depend on any specific flag - just the general optionIntegrate with Ronda Senior X.
Temporary block in Senior Round X
Temporary blocking can be performed by Ronda senior X, synchronized with Ronda Senior.
In the Integrator, the following keys must be added to the config.properties file with valid values as per the comments:
# Blocking reason used to block and unblock people (Must be a valid code in R070MBL.CODMOT). gas.worker.blockreason= # User that will be used to block people (Must be a valid code in R999USU.CODUSU). gas.worker.block.user=
After adding the keys with the values, the integrator must be restarted.
In Ronda senior X on the General Settings screen, the flag must be activatedSynchronize temporary lock. With this flag selected, the temporary blocking will be synchronized for the Senior Ronda. For the flag to be activated there must be a connection with the integrator through RabbitMQ and to check this connection the button must be usedTest Connection.
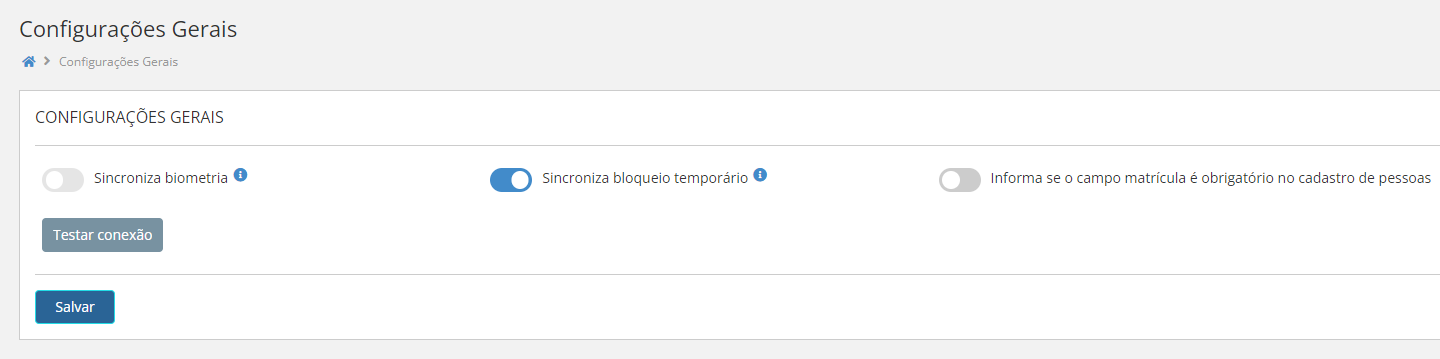
This option has a cache of 15 minutes, so you need to wait this time for the activation or deactivation to be applied.
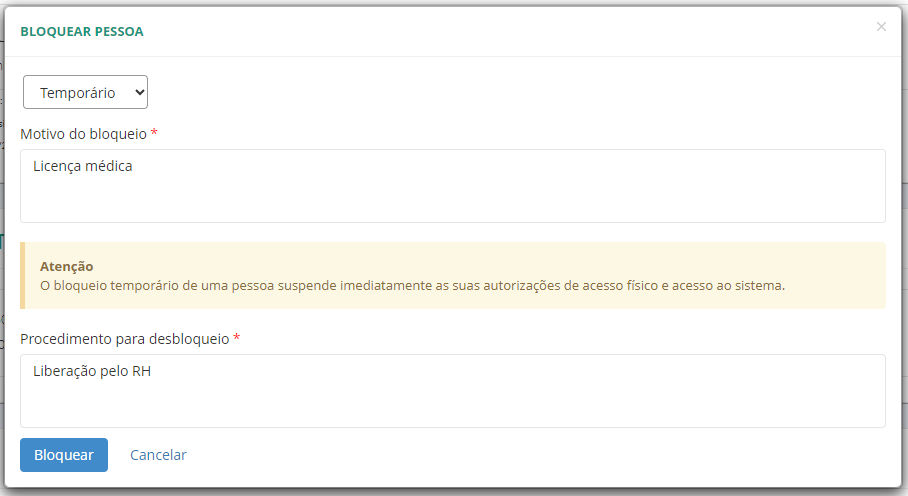
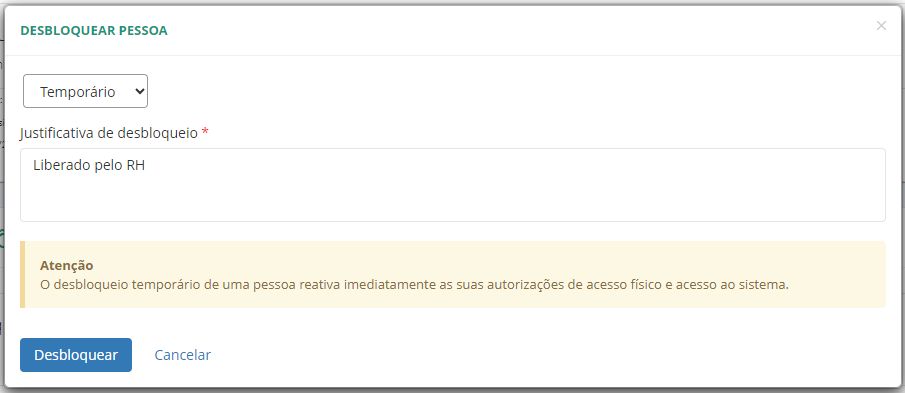
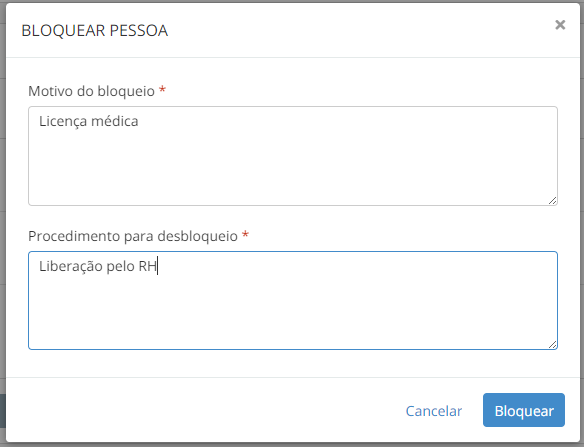
On the Person Registration screen, to block, use the buttonBlock person. TheReason for Blocking and theUnlocking Procedure. The Temporary blocking type must also be selected. Use the buttonBlock to perform the blocking.

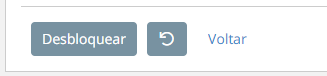
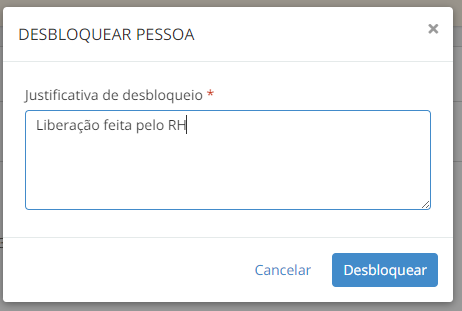
On the Person Registration screen, to unlock it, use the buttonUnlock. It must be informed toJustification for Unblocking. Use the buttonUnlock to perform the unlocking.
On the Reception screen,Person Details, to lock, use the buttonBlock person. TheReason for Blocking and theUnlocking Procedure. Use the buttonBlock to perform the blocking.

To undo the blocking, on the Reception screen, in thePerson Details, the button must be used Unlock. It must be informed toJustification for unlocking. Use the buttonUnlock to perform the unlocking.
To revoke an access, in General registers > People, find the person and click on Revoke accesses. This button is only shown if the person is not blocked. To revoke the access from a person:
- All his/her roles will be finished. Their final date will be the current date and time minus one minute;
- All his/her credentials will be finished, in a way similar to the roles;
- If the person has access credit ranges, they will be removed.
Contrary to blocking, access revoking does not eliminate the person's user and allows the person to receive new roles and credentials.
For the person to be able to access the system and have access authorizations again, the Administrator must be requested to register the roles, logical and physical accesses of the person again. In General registers > People, the administrator must find the person and click on Revoke Accesses.
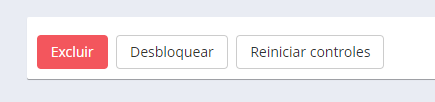
Go to General registers > People, search for the person and click on Restart controls. This will return the person's level and anti-double controls to their default values, i.e., remove the values for the person's current physical location and the date/time of last physical access, in addition to removing the person from the number of people present in theWeb Monitor.
Reset the controls in case the communication between the ID card and the device that reads the level and Antipassback control is lost. This might occur, for example, due to a power outage, network instability, device blocking or a wrong access reading.
Go to General registers > People, search for the person and click on Delete.
When a person is deleted, consequently his/her roles and credentials will be eliminated in the process. This way, the person will not be able to access both the location and the system.
Note
Deleting will be possible if:
- There aren't access events or auditory logs for this person;
- The person is not the initial administrator user of the system;
- The user of this person is not the current user authenticated in the system.